

Last Updated: November 5, 2026
Quick Summary
You can master real fire cooking at home by building a clean fire, controlling airflow instead of fuel, and cooking to internal temperature. Wait 30 to 45 minutes for flames to settle into a glowing coal bed before adding food. These three habits are the whole craft.
- Build a teepee for a coal bed in 30 to 45 minutes, or a log cabin for longer cooks.
- Use seasoned hardwood at roughly 15 to 20 percent moisture and wait for thin blue smoke.
- The minion method lets a single load of charcoal burn steadily for six to twelve hours.
- Hold your smoker between 225°F and 250°F for low and slow smoking.
- Pull large roasts 5°F to 10°F below target to allow for carryover cooking.
Table of Contents
- Why Real Fire Cooking Beats Gas and Pellets for Flavor
- Choosing and Preparing a Safe Cooking Location
- Building and Managing Your Fire for Live-Fire Cooking
- Charcoal Management Techniques for Steady Heat
- Open Fire Cooking Equipment: Grates, Tripods, and Barrel Smokers
- Low and Slow Smoking Methods for Large Gatherings
- Judging Heat and Cooking Temperature Without a Gauge
- Troubleshooting Common Real Fire Cooking Failures
- Choosing the Right Barrel Smoker for Your Backyard
- Frequently Asked Questions
Why Real Fire Cooking Beats Gas and Pellets for Flavor
Real fire cooking is the practice of preparing food directly over burning wood or charcoal, where radiant heat, smoke, and open flame work together to build flavor. Barrel smokers are built for this method, and the reason is simple: no gas valve or pellet feeder produces the same depth of smoke flavor. Gas grills deliver convenience, but they generate almost no smoke. Pellet cookers automate the process so heavily that the fire itself becomes background noise. Neither gives you the control that open-fire cooking rewards. The flavor gap comes from three things happening at once: hardwood smoke settling on the meat, high radiant heat searing the surface, and a coal bed that releases steady, humid heat for hours. Below, we'll show you exactly how to set up, manage, and troubleshoot a real fire at home, whether you're feeding four people or forty.
Choosing and Preparing a Safe Cooking Location
A safe cooking location is flat, non-combustible ground, at least ten feet from walls, fences, and overhanging branches, with nothing above the fire and good airflow on all sides. Gravel, concrete, and bare dirt work. Dry grass, wooden decks, and low tree limbs do not. Check the U.S. Fire Administration guidance on outdoor cooking safety before you light anything; it covers clearance distances and extinguishing requirements that matter more than most backyard cooks realize.
Keep a water source or fire extinguisher within reach. Position the cooker so wind blows smoke away from seating, not into it. Clear the area of leaves, paper, and anything that can catch a stray ember.
What most guides miss is drainage. A fire pit or barrel sitting in a low spot collects rainwater and ash into a paste that rusts steel fast. Pick raised ground or set the cooker on blocks.
Building and Managing Your Fire for Live-Fire Cooking
Fire management is the single skill that separates a good cook from a frustrated one, and it starts before you strike a match. The structure you build determines how much air reaches the fuel, how fast the fire spreads, and how long a coal bed holds heat.
The teepee stacks kindling and split hardwood in a cone with gaps between the pieces. Air flows up through the center, so it lights fast and burns hot. It is the right choice for an open pit or a fire bowl where you want a coal bed in 30 to 45 minutes.
The log cabin lays split wood in alternating layers with a fire starter in the middle. It holds its shape longer than a teepee and produces a steadier coal bed, which makes it the better structure for a long cook where you plan to add fuel in stages.
The minion method is the barrel-smoker layout: unlit charcoal fills the basket, and a chimney of lit coals pours over the top. The fire spreads slowly downward and outward through the pile, so a single load burns steadily for six to twelve hours depending on basket size and vent settings.
Light the base and leave the structure alone for the first ten minutes. Poking it too early collapses the air channels and smothers the flame. Once the fire is established, manage it with airflow rather than fuel: open the intake vents to feed oxygen and raise temperature, close them to choke the fire down. Exhaust vents should stay open enough to let smoke escape; a starved exhaust makes thick, acrid smoke that settles on the food.
Watch out: adding a full chimney of lit coals to a fire that is already at temperature will overshoot your target by 50°F or more and take twenty minutes to settle. Add a few coals at a time and let the vents do the fine adjustment.
Firewood, Hardwood, and Kindling Selection
Hardwood is the only fuel worth using for smoke flavor, but the choice within hardwoods changes the result. Oak and hickory are the strongest smoke producers and suit beef and pork. Apple and cherry are milder and sweeter, which makes them a better match for poultry and vegetables. Pecan sits between the two, nutty and moderate. Softwoods like pine and cedar burn hot and fast, coat your food in creosote, and should stay out of your cooker entirely.
Seasoning matters as much as species. Seasoned wood has been dried for at least six months, ideally a year, down to roughly 15 to 20 percent moisture. Green wood hisses, smolders, and turns your meat bitter because the water in the wood cools the fire and produces incomplete combustion. A moisture meter takes the guesswork out of it; split a piece and test the fresh face, not the end grain.
A common mistake is oversmoking. Thin blue smoke is what you want. Thick white smoke means an inefficient fire, and it will leave an acrid taste on anything it touches. If the smoke turns white and billowy, open the intake a little and let the fire clean itself up before you put food on.
Waiting for Flames to Settle Into Coals
Flames are for show. Coals are for cooking. Wait until the fire dies down to a glowing coal bed with a light ash coating before you put food anywhere near it. That usually takes 30 to 45 minutes from lighting, longer in cold or damp conditions. The USDA Food Safety and Inspection Service guidance on smoking meat confirms that cooking over a settled coal bed also helps you maintain the safe internal temperatures that prevent foodborne illness.
A settled coal bed gives you radiant heat without the flare-ups that raw flame causes when fat drips. If you are cooking on a grate, the coals should be gray on the surface with orange glow underneath. If you are smoking in a barrel, the coal bed is the engine, and the wood chunks you add on top of it are the flavor source; keep the chunks small so they ignite and produce smoke rather than smolder.
Charcoal Management Techniques for Steady Heat
Charcoal management is the practice of controlling fuel, airflow, and ash so your fire holds a target temperature for hours. Three techniques do most of the work:
- The minion method: unlit charcoal in the basket, lit coals on top. The fire spreads slowly through the pile.
- Vent control: intake vents feed oxygen, exhaust vents release smoke. Close both down to drop temperature; open them to raise it.
- Ash removal: a clogged ash tray chokes airflow. Empty it before every cook.
Watch out: opening the lid to check on food every twenty minutes adds fifteen to twenty degrees each time and lengthens your cook. Trust your thermometer.
Open Fire Cooking Equipment: Grates, Tripods, and Barrel Smokers
The essential open fire cooking equipment is a heat-proof cooking grate, a tripod or hanging system for height adjustment, long-handled tools, heat-resistant gloves, and a reliable thermometer. A barrel smoker combines all of these into one unit.
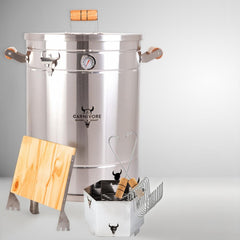
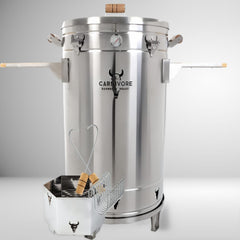
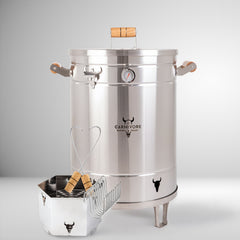
Carnivore Mini Barrel Smoker →
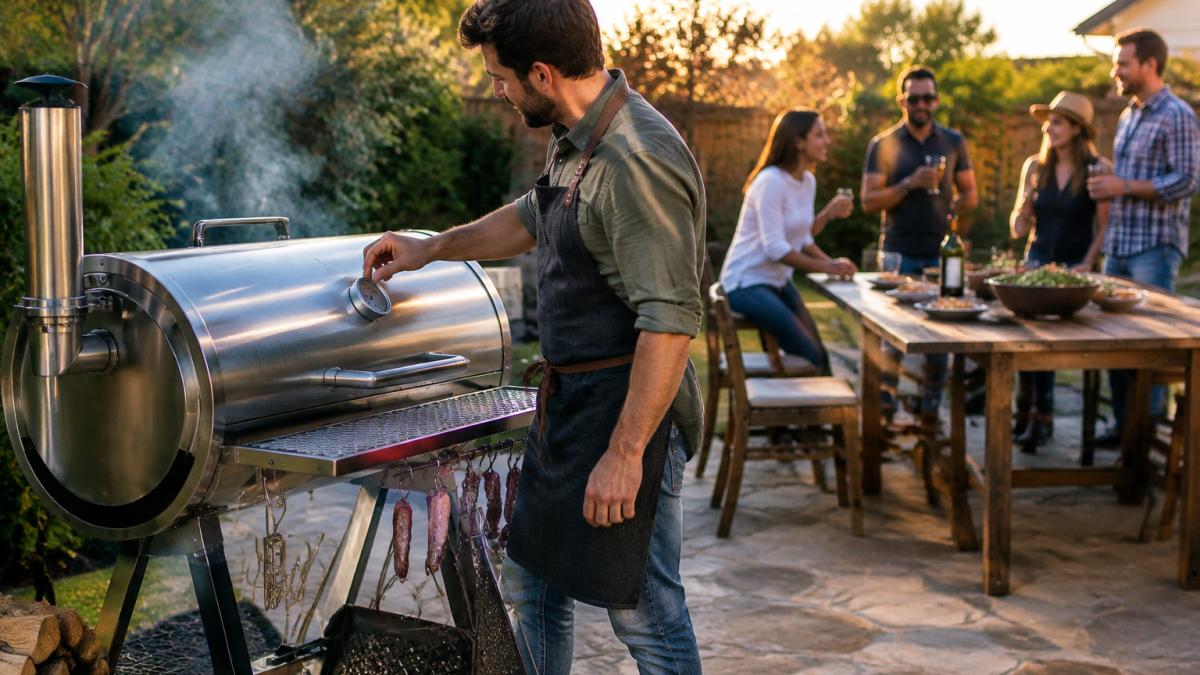
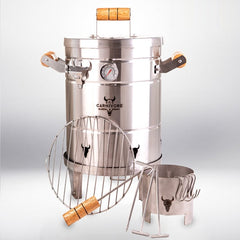
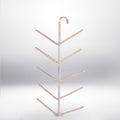
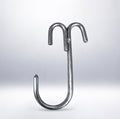
Grates give you direct-heat grilling for steaks and burgers. Tripods let you raise or lower food over coals for precise heat control. Barrel smokers hang meat from hooks so it cooks by convection, with juices basting the food from above. The barrel smokers are made from food-grade 304 stainless steel with a lifetime rust warranty, and they ship free within the United States. If you want to expand what you can cook, browse the sausage and burger racks that fit every model.
Low and Slow Smoking Methods for Large Gatherings
Low and slow smoking means holding a cooker between 225°F and 250°F for several hours until tough cuts turn tender. For a crowd, the work is in the planning, not the cooking.
Plan your timeline backward from serving time. A pork shoulder needs roughly 90 minutes per pound at 225°F. A brisket runs 12 to 16 hours. Load the smoker once, keep the lid closed, and let the fire do its job.
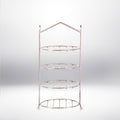
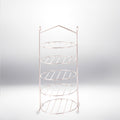
For volume, hanging is more efficient than laying flat. A barrel with hooks holds far more meat than a single grate. The multi-use rack adds four levels of surface for burgers, vegetables, and sides, so you can smoke a full menu in one cook.

Judging Heat and Cooking Temperature Without a Gauge
The hand test tells you fire temperature in seconds. Hold your palm at cooking height and count: 2 to 3 seconds means high heat around 450°F to 500°F, 4 to 5 seconds is medium at roughly 350°F, and 6 to 8 seconds is low at about 250°F. It is imprecise, but it works when a thermometer fails. Use it as a sanity check, not as your primary gauge; a $15 instant-read thermometer is the single most useful tool in live-fire cooking because it turns guesswork into a repeatable result.
For actual doneness, cook to internal temperature and account for carryover. The USDA safe minimum internal temperature chart lists every category, and these are the targets that matter most over a live fire:
- Poultry, whole or parts: 165°F in the thickest part, away from bone.
- Ground meat, beef and pork: 160°F.
- Whole cuts of pork and beef: 145°F with a three-minute rest.
- Fish: 145°F, or until the flesh flakes.
Carryover cooking is the rise in internal temperature after the food leaves the heat. A large roast or a whole bird can climb 5°F to 10°F while it rests, so pull it 5°F to 10°F below your target and let it rest covered for ten to twenty minutes. A steak pulled at 130°F will coast to a medium-rare 135°F during a five-minute rest; pull it at 145°F and it will finish closer to medium-well.
Direct heat suits steaks and burgers, where you want a crust in minutes. Indirect heat suits roasts and whole birds, where you want the center to come up slowly without the outside burning. On a barrel smoker, the difference between the two is where you place the food relative to the coal basket, not a dial.
Watch out: probing a steak or burger too early lets heat escape and slows the cook. Wait until you are within about 10°F of your target, then check every few minutes rather than every thirty seconds.
Troubleshooting Common Real Fire Cooking Failures
Most real fire cooking failures trace back to four causes. Here's how to fix each one.
| Problem | Likely Cause | Fix |
|---|---|---|
| Bitter, acrid taste | Thick white smoke or green wood | Use seasoned hardwood; wait for thin blue smoke |
| Temperature spikes | Too much lit fuel or open vents | Close intake vents; remove excess coals |
| Fire keeps dying | Blocked airflow or wet fuel | Clear the ash tray; check vents and wood dryness |
| Meat dries out | Cooking too hot or too long | Hold 225°F to 250°F; pull at target internal temp |
| Flare-ups | Fat dripping onto open coals | Move food to indirect heat; trim excess fat |
A common mistake is chasing temperature with fuel instead of airflow. Vents respond faster and won't overshoot.
Choosing the Right Barrel Smoker for Your Backyard
The right barrel smoker matches your typical crowd size, not your biggest party. Browse the Carnivore Barrel Smokers to see all four models and pick the size that fits your backyard. Here is how the range breaks down.
| Model | Price | Capacity | Best For |
|---|---|---|---|
| Mini | $279 | 12 lbs | Up to 5 people |
| Medium | $379 | 25 lbs | Up to 12 people |
| Large | $455 | 45 lbs | Up to 25 people |
| Jumbo | $645 | 65 lbs | Up to 40 people |
All four are made from food-grade 304 stainless steel, include hooks, a folding grill grate, a charcoal basket, and a thermometer, and carry a lifetime rust warranty. If you cook for a family of four most weekends, the Mini or Medium handles it without wasted fuel. If you host events, the Jumbo's 65-pound capacity and two wood side tables earn their space. Compare the full lineup on our barrel smoker models page, or check setup guides and recipes to see how each one lights and runs.
Mastering real fire cooking at home comes down to three habits: build a clean fire, control airflow instead of fuel, and cook to internal temperature. That's the whole craft. At Carnivore U.S.A, we make barrel smokers from food-grade 304 stainless steel with a lifetime rust warranty, free shipping across the United States, and a design that lets you light the charcoal, hang your food, and walk away. Our smokers feed anywhere from 5 to 40 people, so whether you're cooking a weeknight chicken or a full gathering, the fire does the work. Get started with Carnivore U.S.A and cook a whole feast over real charcoal this weekend.
Frequently Asked Questions
What is the best fuel for real fire cooking at home?
Hardwood charcoal and dry hardwood logs give the cleanest flavor and the steadiest coal bed. Briquettes burn more predictably but add a filler smell that can mask smoke flavor. For low and slow smoking methods, start with a full charcoal basket of lump hardwood, light it in a chimney, and add two or three fist-sized wood chunks for smoke. Avoid softwoods like pine, which pop and leave soot on your food.
How do you control temperature when cooking over an open fire?
Control comes from three levers: fuel amount, airflow, and distance from the coals. Build a two-zone fire with coals banked to one side, then move food closer or farther to adjust heat. Use the hand test, holding your palm at grate height and counting seconds, to judge cooking temperature. For long cooks, open the vents a quarter turn to raise heat and close them to drop it. Small adjustments every 20 minutes beat big corrections.
Is real fire cooking safer than traditional gas grilling?
Neither method is inherently safer; both depend on setup and attention. Real fire cooking adds open flames, embers, and ash, so keep the fire pit or smoker at least 10 feet from structures, never use it in a garage or under a low roof, and keep a water source or extinguisher within reach. Gas grills carry leak and flare-up risks. With proper clearance, a stable surface, and never leaving a live fire unattended, real fire cooking is a controlled, repeatable process.
What essential equipment do I need to start fire cooking?
You need a heat-proof cooking surface, a way to manage fuel, and tools to move food. At minimum: a fire pit or barrel smoker, a cooking grate or tripod, long-handled tongs, heat-resistant gloves, a chimney starter, and a reliable thermometer. Add a charcoal basket for steady burns and meat hooks if you plan to hang cuts. A multi-use rack expands your cooking surface for burgers, vegetables, and sausages alongside larger cuts.
How long does it take to master live-fire cooking techniques?
Focusing on one variable at a time helps cooks build skill steadily over repeated sessions. Start with fire building and coal management, then practice heat judgment with the hand test, then move to low and slow smoking methods. Expect real fluency after roughly 10 to 15 cooks, once you can read your fire by sound, smell, and coal color without checking a gauge every few minutes.
Can you cook a full feast for a large group using real fire?
Yes, with the right capacity and a plan. A barrel smoker rated for 25 to 65 pounds of meat can hold multiple chickens, a pork shoulder, and sausages at once. Light a full charcoal basket, bring the smoker to 225 to 250°F, hang or rack the food, and let convection do the work. Start long cuts first, add quicker items later, and rest meat in a cooler while you finish sides. Feed 40 people from one barrel with staggered timing.
